



1. Objectives
- Understand the basic structure of email systems
- Understand the client and server sides, and the communication between servers
- Analyze and understand the SMTP and POP3 protocols
2. Experimental Environment
- Hardware requirements: One Alibaba Cloud ECS instance
- Software requirements: Linux/Windows operating systems
3. Experimental Content
3.1 Using a Mail Client to Send/Receive Mail
Configure a mail user agent (for example, Windows, Outlook, Express, Thunderbird on Linux, etc.; you can use the one that comes with the system or download it yourself), to compose locally and receive your QQ Mail.
3.2 Local Email Sending/Receiving
Use a local client to compose and send QQ emails. At the same time, use Wireshark to capture packets and analyze its communication process and protocols.
3.3 Web Mail
Use a browser to log in to QQ Mail, compose and send QQ emails. Also use Wireshark to capture packets and analyze the communication process and protocols.
3.4 Telnet Email Sending/Receiving
Use the telnet command to log in to the QQ Mail server and send emails. Also use Wireshark to capture packets to analyze the communication process and protocols.
Refer to online resources for the exact commands and port queries.
4. Results and Analysis
4.1 Using a Mail Client to Send/Receive Mail
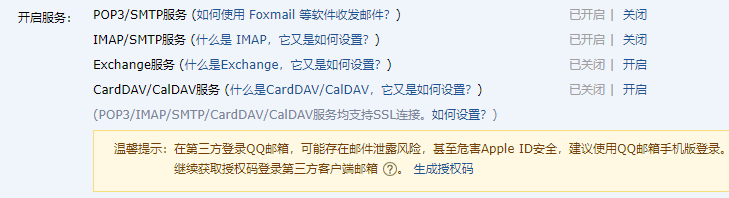
- Open QQ Mail, enable POP3/SMTP services, and obtain an authorization code.
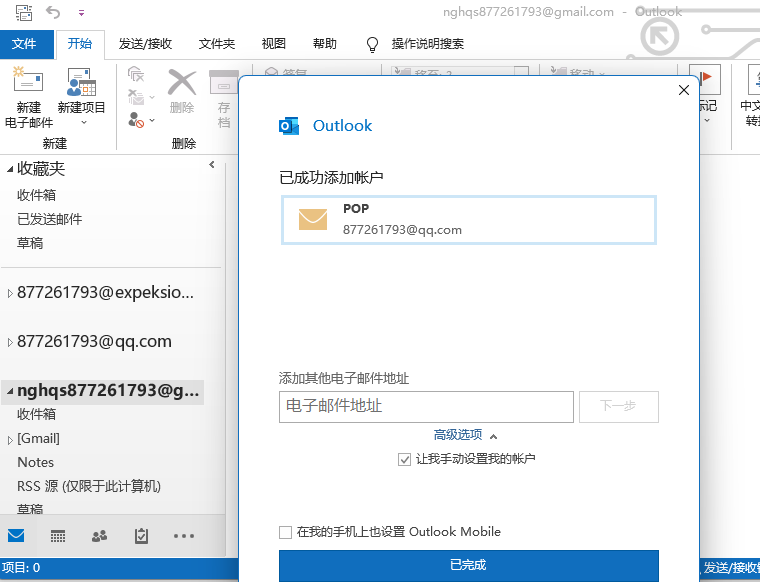
- Follow the instructions provided by QQ Mail to bind Outlook to QQ Mail
4.2 Local Email Sending/Receiving
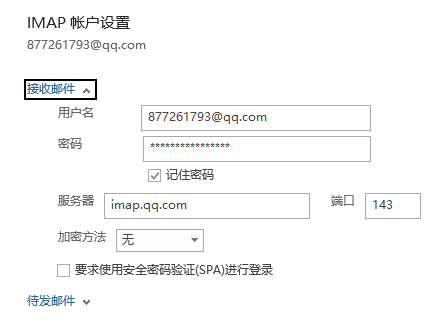
- Disable account SSL
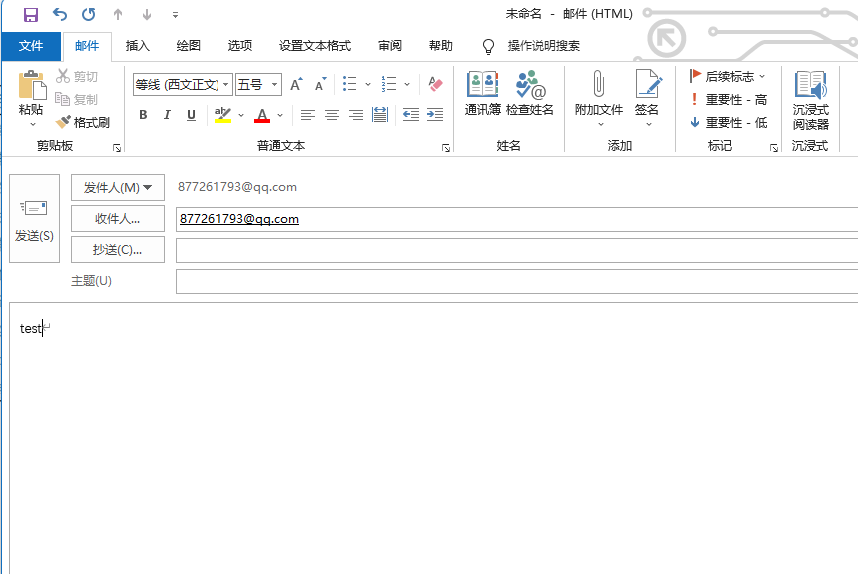
- Use Wireshark to capture packets on the WLAN and send emails
- Use Wireshark to trace SMTP
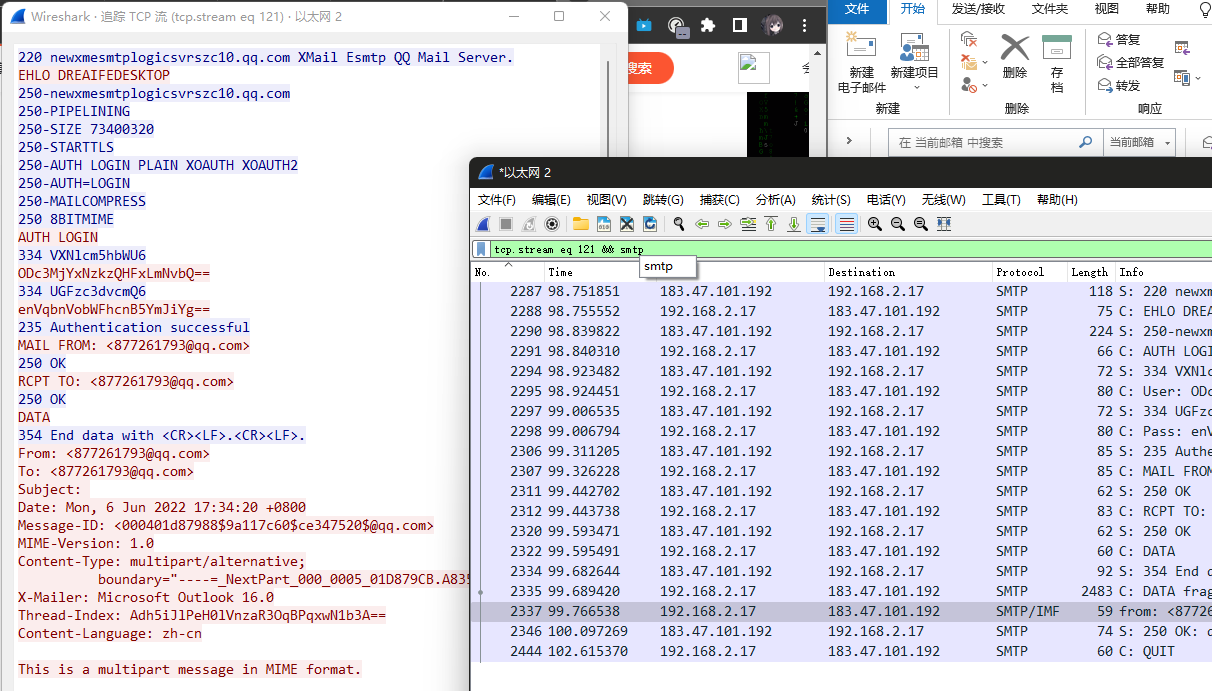
- Analyze the communication process and protocols
C: telnet imap.qq.com 25 //Connect to QQ mail server via telnetS: 220 newxmesmtplogicsvrszc10.qq.com XMail Esmtp QQ Mail Server. //Connection successful, 220 is the status code, followed by welcome messageC: EHLO DREAIFEDESKTOP //Identify to the serverS: 250-newxmesmtplogicsvrszc10.qq.com | PIPELINING | SIZE 73400320 | STARTTLS | AUTH LOGIN PLAIN XOAUTH XOAUTH2 | AUTH=LOGIN | MAILCOMPRESS | 8BITMIME //SuccessC: AUTH LOGIN //LoginS: 334 VXNlcm5hbWU6C: User: ODc3MjYxNzkzQHFxLmNvbQ== //Base64 of username and authorization codeS: 334 UGFzc3dvcmQ6C: Pass: enVqbnVobWFhcnB5YmJiYg==S: 235 Authentication successfulC: MAIL FROM: <[email protected]> //Sender emailS: 250 OKC: RCPT TO: <[email protected]> //Recipient emailS: 250 OKC: DATA //Email contentS: 354 End data with <CR><LF>.<CR><LF>.C: DATA fragment, 2429 bytesfrom: <[email protected]>, subject: , (text/plain) (text/html)S: 250 OK: queued as.C: QUIT //Send complete and exitS:221 Bye4.3 Web Mail
- Use Wireshark to capture packets on the WLAN and send email

- Use Wireshark to trace TLS/SSL
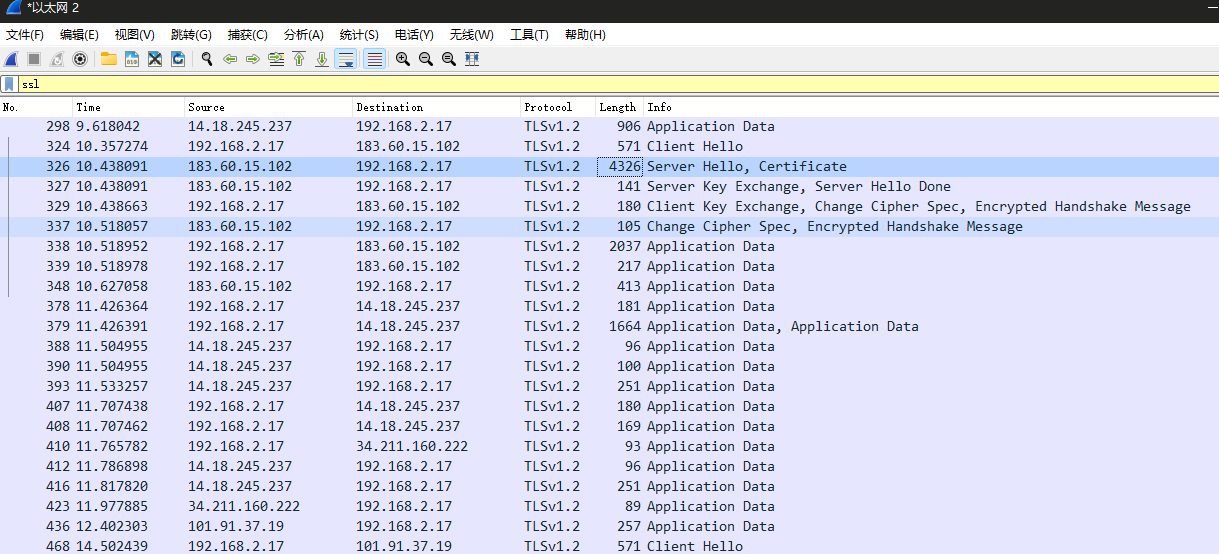
- Analyze the communication process and protocols
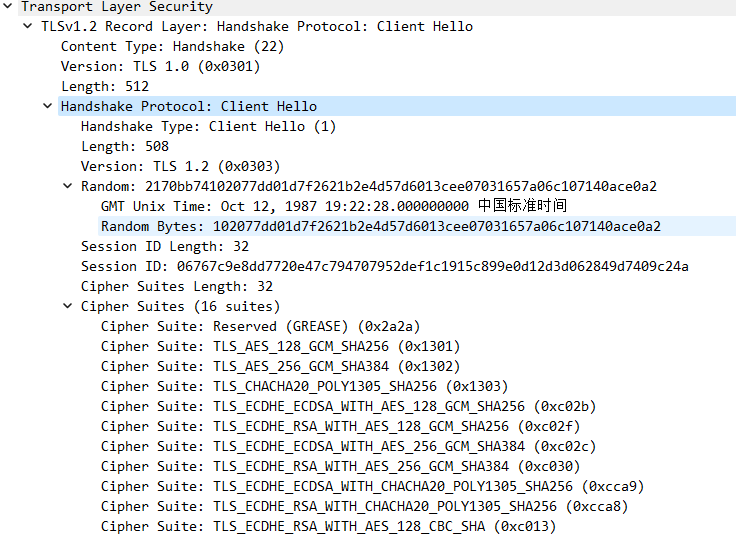
Client Hello
The first step of the TLS handshake is the client initiating the request, mainly including the random string generated by the client (session key), as well as the list of cipher suites supported by the client, random numbers, and other information.
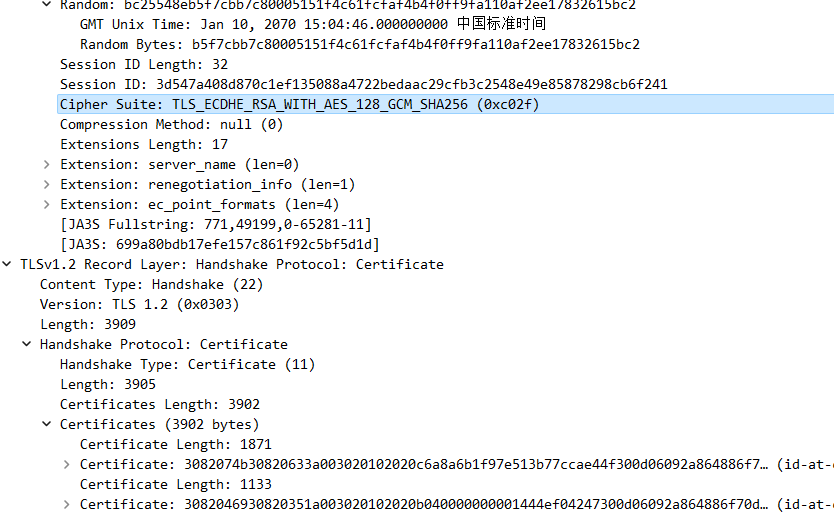
- Server Hello && Certificate
After receiving the Client Hello data from the client, the server selects a cipher suite from the client’s list and generates a random string to return to the client. The key exchange algorithm chosen is ECDHE_RSA, the symmetric encryption algorithm uses AES_128_GCM_SHA256, and the server’s certificate information is also returned.
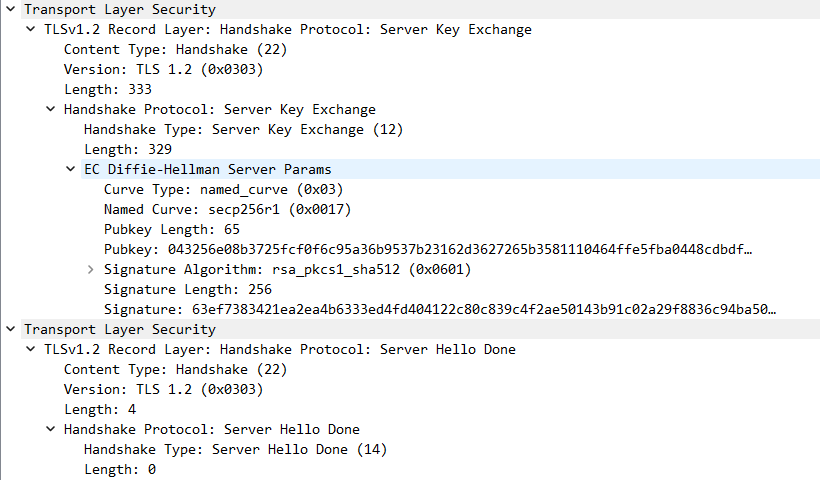
- Server Key Exchange & Server Hello Done
The server returns a Server Key Exchange packet to exchange the keys used for data encryption with the client, and Server Hello Done to notify the client that the data for key exchange has been sent and to wait for the client’s response.
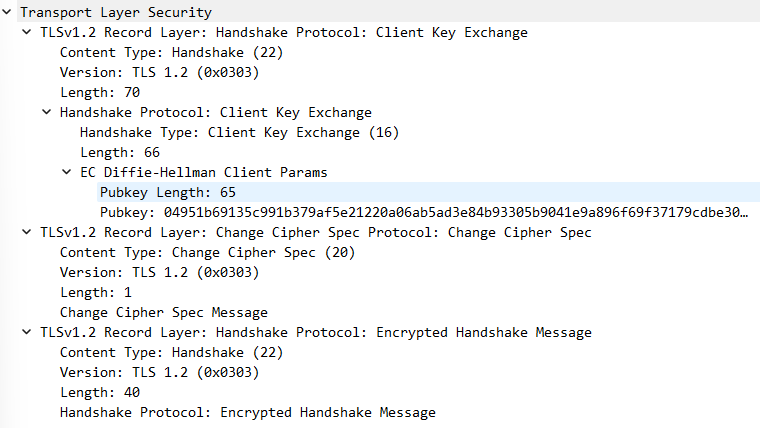
- Client Key Change & Change Cipher Spec & Encrypted HandShake Message
The client uses the server-provided DH data to generate DH data and send it to the server to generate the final pre-master secret. As shown:
- Application Data
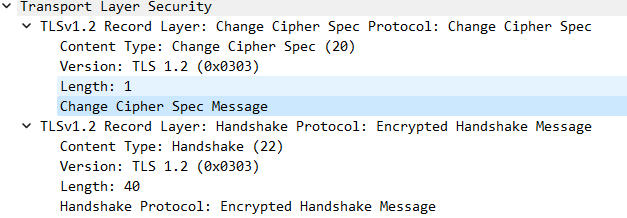
- Change Cipher Spec & Encrypted HandShake Message
Session keys should be refreshed periodically






4.4 Telnet Email Sending/Receiving
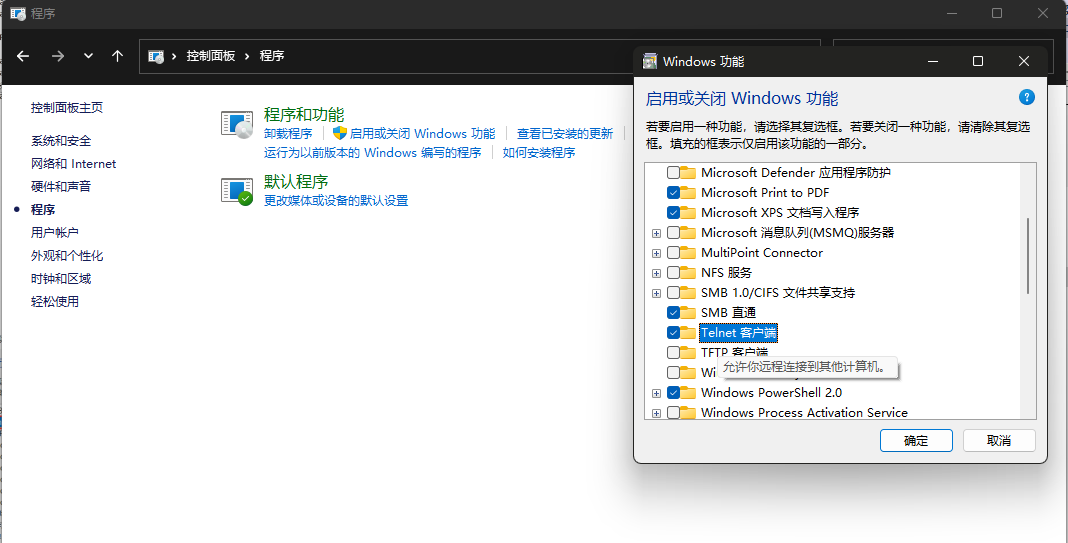
- Enable Telnet on the computer and use Wireshark to capture packets
- Open cmd to operate
Enter telnet imap.qq.com 25 to connect to the server and input the following commands
- Email sending completed
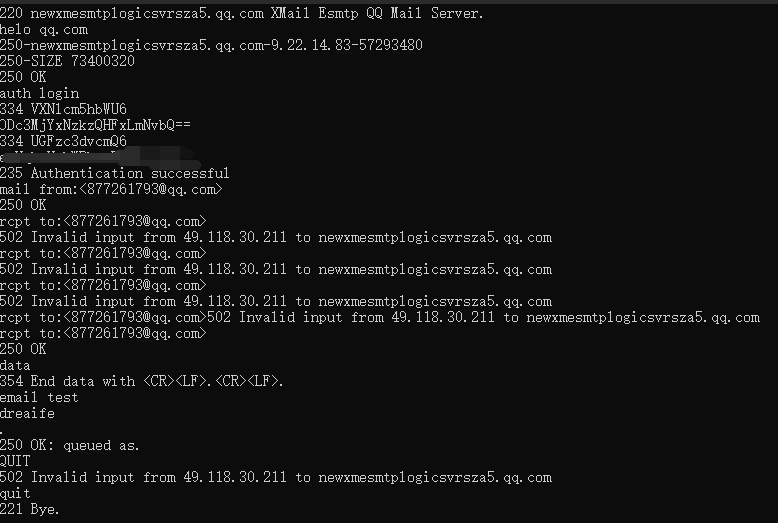
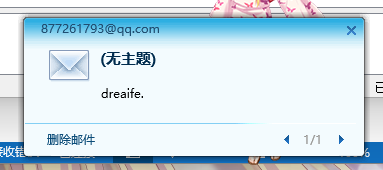
- Analyze the communication process and protocols
C: telnet imap.qq.com 25 //Connect to QQ mail server via telnetS: 220 newxmesmtplogicsvrszc10.qq.com XMail Esmtp QQ Mail Server. //Connection successful, 220 is the status code, followed by welcome messageC: helo qq.com //Identify to the serverS: 250-newxmesmtplogicsvrsza5.qq.com-9.22.14.83-57293480S: 250-SIZE 73400320S: 250 OK //SuccessC: auth login //LoginS: 334 VXNlcm5hbWU6C: User: ODc3MjYxNzkzQHFxLmNvbQ== //Base64 of username and authorization codeS: 334 UGFzc3dvcmQ6C: Pass: enVqbnVobWFhcnB5YmJiYg==S: 235 Authentication successfulC: MAIL FROM: <[email protected]> //Sender emailS: 250 OKC: RCPT TO: <[email protected]> //Recipient emailS: 250 OKC: DATA //Email contentS: 354 End data with <CR><LF>.<CR><LF>.C: DATA fragment, 2429 bytesfrom: <[email protected]>, subject: , (text/plain) (text/html)S: 250 OK: queued as.C: QUIT //Send complete and exitS:221 Bye5. Conclusions
5.1 Problems and Solutions
The issue when using Xftp to connect to the server: connection errors; the solution was to switch to campus network, after which it returned to normal. Investigation showed it was due to the server firewall.
5.2 Reflections
- This lab report familiarizes the actions of code and software involved in SMTP protocol analysis, as well as the analysis and extraction of SMTP messages, validating the knowledge learned in class. Through this experiment, I mastered the concrete process and steps of sending emails via Telnet, understood the basic usage of common SMTP protocol analysis tools, and improved my programming ability.
- Through these common SMTP protocol analysis commands, tracking SMTP usage, and analyzing the structure of SMTP messages, I reinforced the knowledge taught in class.
If this article helped you, please share it with others!
Some information may be outdated